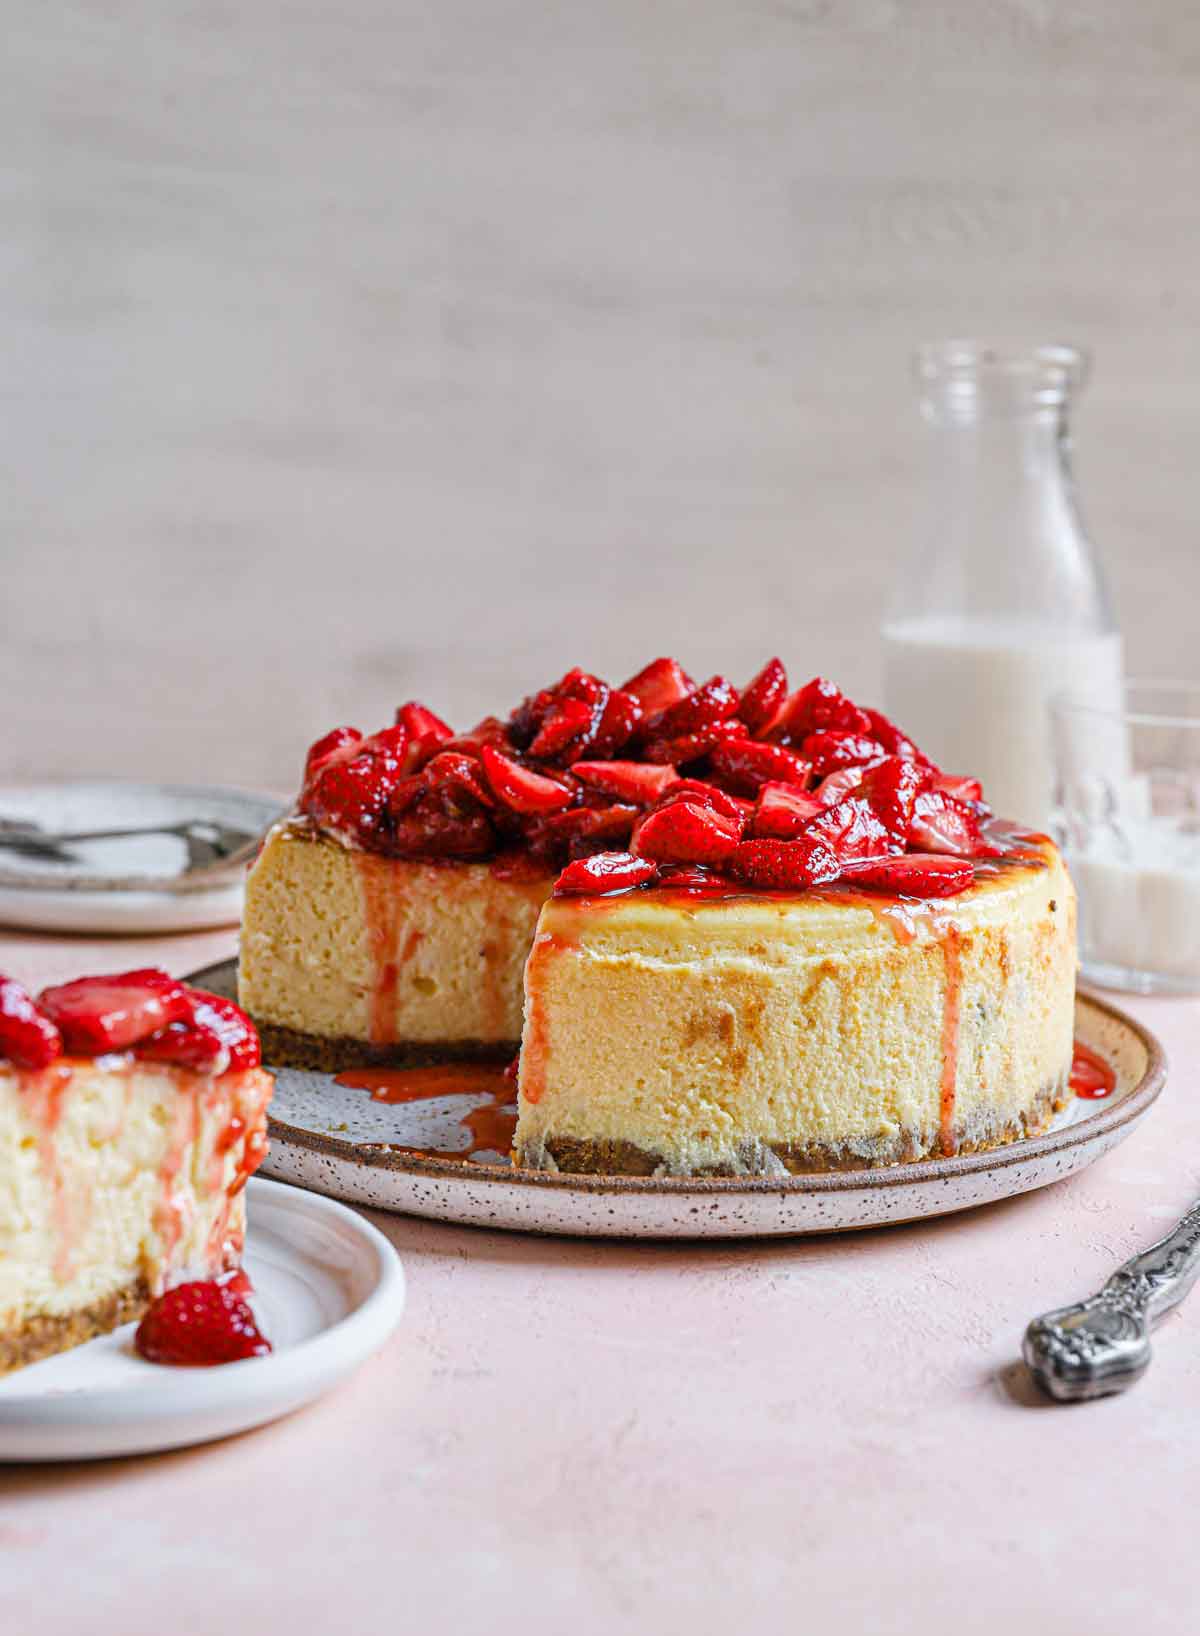
New York Cheesecake
Follow this classic New York Cheesecake recipe for a creamy, rich, and decadent dessert. Serve it plain or with your favorite cheesecake toppings (lots of suggestions below) for an impressive holiday, birthday, dinner party, or special occasion dessert!
Cheesecake is one of my great loves. Over the years, I've shared many, many cheesecake recipes, including brownie cheesecake, Oreo cheesecake, fig almond cheesecake, pumpkin cheesecake, red velvet cheesecake, and peanut butter fudge cheesecake (among others!).
Today, we're taking a deep dive into the ultimate cheesecake recipe: New York-style cheesecake with a classic graham cracker crust and a sky-high cheesecake filling.
Why Homemade Cheesecake Is the Best
While homemade cheesecake can be a little time-consuming and look a little intimidating, it's a great recipe for bakers of any level. It doesn't require very much hands-on time. Many cheesecake recipes require baking cheesecake in a water bath to ensure an even bake and reduce the risk of cracks forming on the top of the cake, but you won't need to use a hot water bath to make this recipe (which is one of the things I love about it)!
There are two parts to cheesecake - both simple to make with basic baking ingredients; a traditional graham cracker crust and ultra-creamy cheesecake filling.
If you've ever tasted cheesecake from scratch, you know the results are absolutely, 100% worth it!
“Regular Cheesecake” vs New York Cheesecake
Almost every style of baked cheesecake has a base of cream cheese and eggs. The difference lies in the amount of cream cheese and the addition of sour cream.
"Regular" cheesecake is traditionally lighter in texture and baked to pale perfection. For a classic cheesecake recipe (not New York style) try my Oreo cheesecake recipe. Simply omit the Oreo cookies for a plain version.
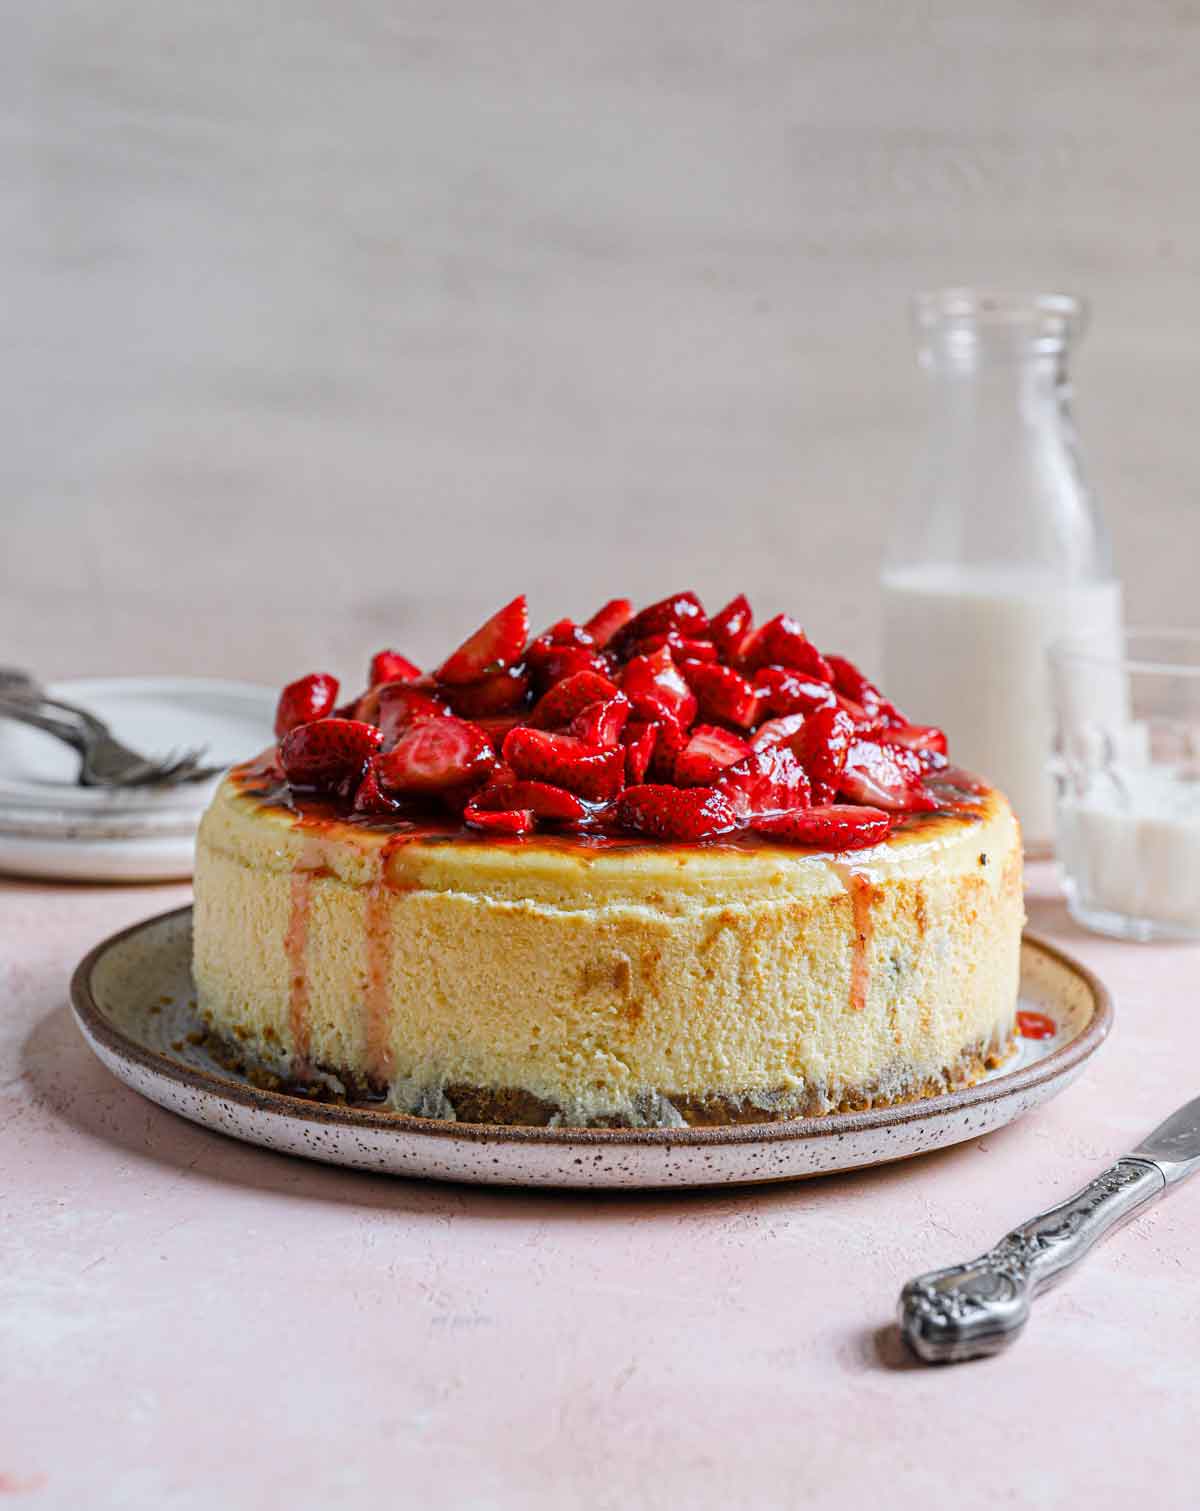
New York-style cheesecake is made with more cream cheese than regular cheesecake; it's typically denser and richer and is sometimes browned on top. (Side note: another variation of New York cheesecake involves baking a layer of sour cream on top of the cheesecake at the end.)
Simple Ingredients
The beauty of a classic cheesecake is that it relies upon a simple list of ingredients to create rich decadence! I’ve highlighted some of the important ones below. As always, check the recipe card below for a full list of ingredients and quantities.
- Graham Crackers (for the crust) – You can use store-bought graham cracker crumbs or crush up whole graham crackers.
- Cream Cheese – Be sure to use full-fat cream cheese for a cheesecake that is firm and creamy, not watery or runny.
- Sour Cream – Again, use full-fat sour cream.
- Lemon Juice – Fresh or bottled is fine; the flavor is very subtle, but you can omit it if you prefer.
How to Make New York Cheesecake
Complete instructions for making this delicious New York cheesecake recipe are in the recipe card at the bottom of this post, but here's a quick recap:
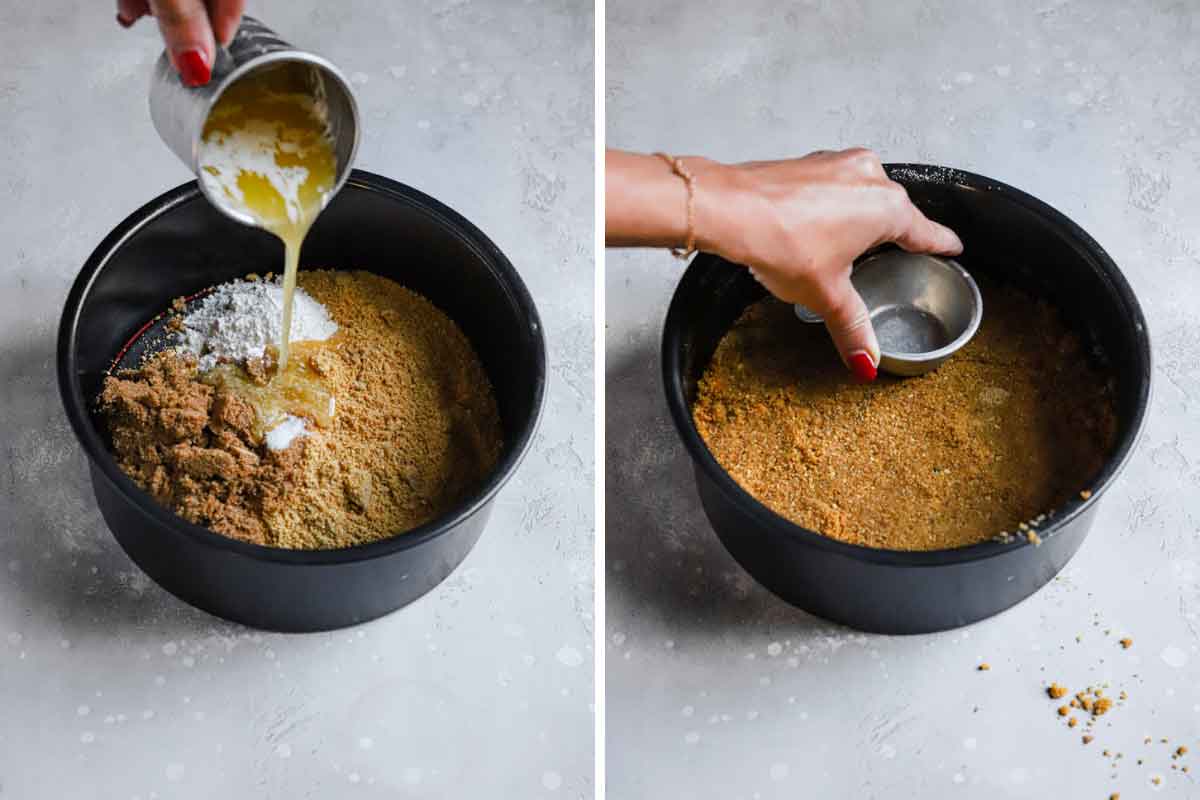
Step #1: Make the Crust – Mix together the graham cracker crumbs, brown sugar, salt, and melted butter, then press into the bottom and about an inch of the way up the prepared pan. (If you want to double the crust, you can press it higher up the pan.) You will then bake the crust and set it aside to cool while you make the filling.
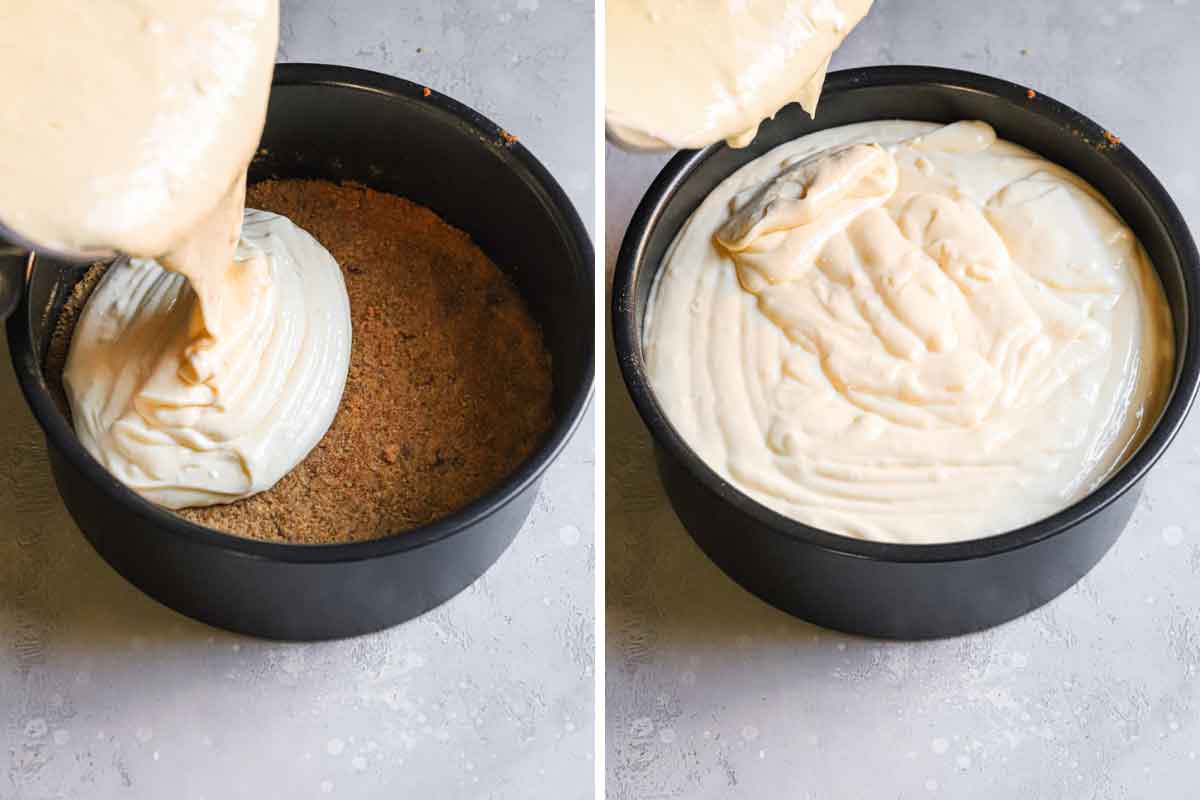
Step #2: Make the Cheesecake Filling – You will mix together the filling ingredients (cream cheese, sugar, sour cream, lemon juice, vanilla extract, and eggs), then pour the cheesecake batter into the prepared crust.
Save This Recipe
Step #3: Bake Low and Slow – Bake at 200 degrees F until the cheesecake reaches 150 degrees F on an instant-read thermometer. This takes anywhere from 2 hours 15 minutes to 3 hours.
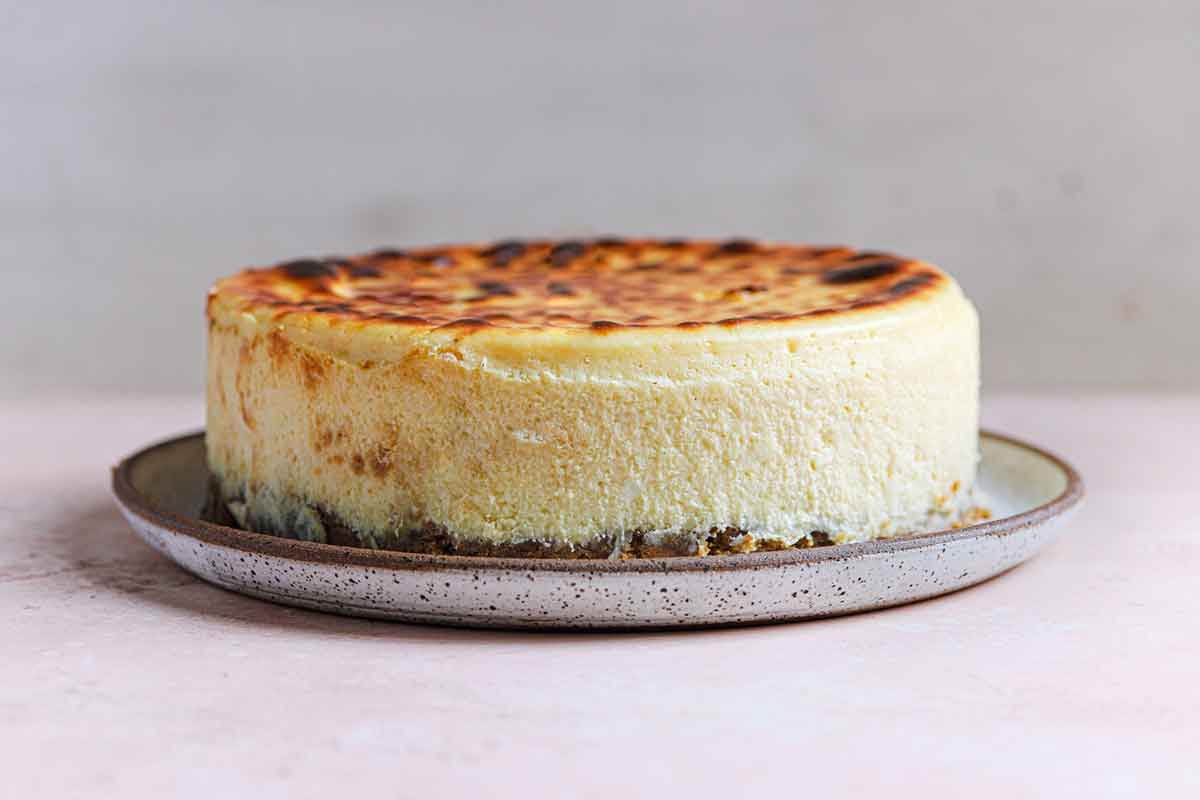
Step #4: Brown the Top – Increase the oven temperature to 500 degrees F and pop the cheesecake back in the oven for a few minutes to get a classic browned top (or skip this step if you prefer a paler top!).
Step #5: Chill – This is a crucial step! Let the cheesecake cool completely to room temperature, then refrigerate for at least 6 hours or overnight.
Revised and Updated Cheesecake Baking Method
The Original Recipe: Many of you may be familiar with the original form of this cheesecake recipe that I published in 2013. That recipe required you to start baking the cheesecake at 500 degrees F for 10 minutes, then lower the temperature to 200 degrees F for the remaining baking time. I've received a mixed bag of comments and reviews over the years - some readers comment that it turns out perfectly, while others say the cheesecake was completely burnt on top. I couldn't identify where to make changes to the recipe because every time I made it, it turned out wonderfully.
So, I re-tested it in a new-to-me oven. And it burned… and cracked. I was stumped after making so many successful cheesecakes following this method, so I did a ton of reading and research.
As it turns out, the time it takes your oven to drop in temperature makes all the difference. All ovens vary in the amount of time it takes to drop in temperature, and in this particular recipe, we're dropping the temperature by 300 degrees F. If your oven lowers in temperature quickly, you likely would not have had a problem. However, if an oven takes a long time to drop the temperature, the cheesecake bakes at a higher temperature for too long, resulting in a too-dark and cracked top.
The Updated Recipe: Since a slightly toasted top is characteristic of a New York cheesecake, I wanted to figure out how to make this work. As it turns out, Cook's Illustrated also re-visited this recipe and flipped the order of baking. START the cheesecake in an oven at 200 degrees F and finish the cheesecake at 500 degrees F for a few minutes to get that classic browned top.
This also provides another benefit - if you like a purely pale cheesecake without any color on top, you can completely skip the last step of browning with no other adjustments needed!
Topping Ideas
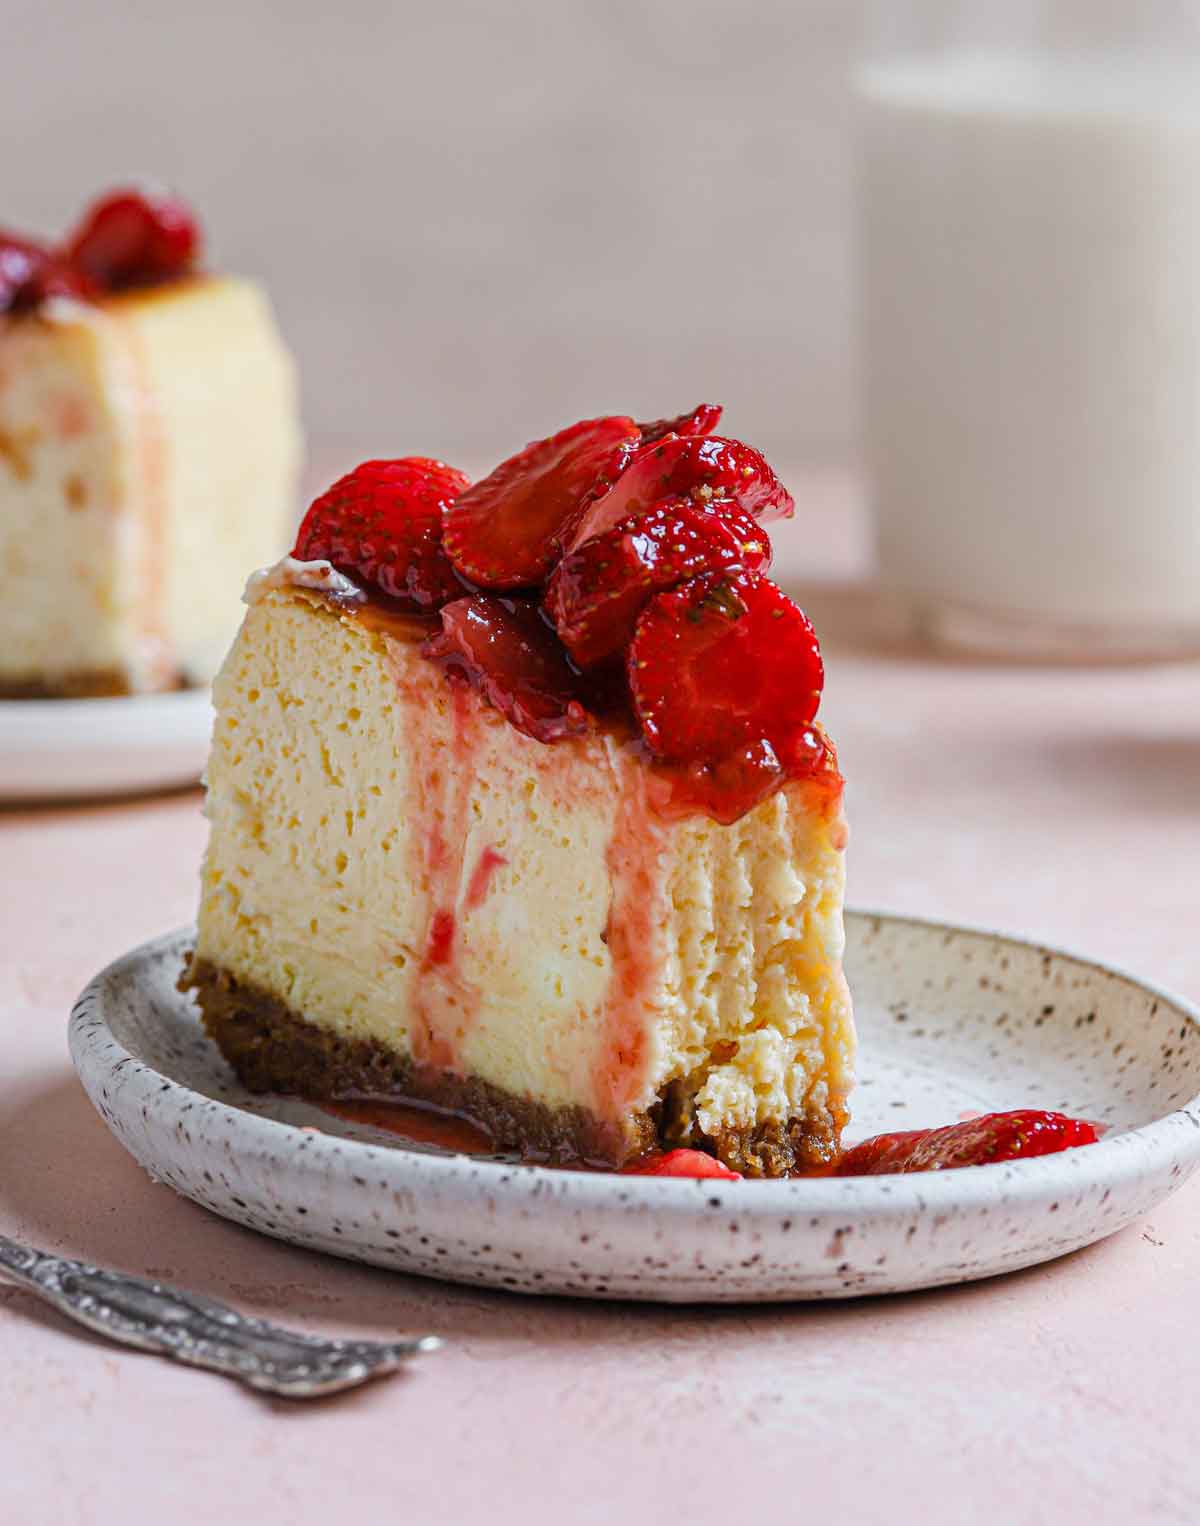
While a fabulous cheesecake can absolutely stand on its own, sometimes it's nice to dress it up a bit when serving to others (you could even set up a cheesecake topping bar!). You'll find a recipe for fresh strawberry topping included with the cheesecake recipe below, and here are some other cheesecake topping ideas:
- Homemade whipped cream (or from a can!)
- Salted caramel sauce (homemade is linked, or store-bought)
- Hot fudge sauce (homemade is linked, or use store-bought)
- Chocolate ganache
- Fresh fruit – Blueberries, cherries, raspberries, blackberries, etc.
- Canned pie filling – Spoon some over top of the entire cheesecake, or just individual slices.
- Fruit compote
- Powdered sugar
- Crushed Oreos or other cookies/candy
- Chocolate shavings
How to Store and Freeze Cheesecake
- Storage: Keep the cheesecake in an airtight container or wrapped in plastic wrap in the refrigerator for up to 4 days.
- To Freeze the Entire Cheesecake: Chill overnight in the refrigerator, wrap in plastic, then wrap in aluminum foil, and place in a zip-top freezer bag. Freeze for up to 3 months. Thaw in the refrigerator overnight before serving.
- To Freeze Slices of Cheesecake: Wrap each slice individually in plastic wrap, then place in a zip-top freezer bag. Freeze for up to 3 months. Thaw in the refrigerator overnight or at room temperature for about 45 minutes.
Recipe Notes & Success Tips
- Mixer: This recipe comes together best when you use an electric mixer; while a stand mixer makes an easy job of it, you can also use a hand mixer if that is all you have, just be sure to use a large mixing bowl!
- Springform Pan: To make this deep dish New York cheesecake recipe, a springform pan is essential. Using this pan will give your cheesecake height and, because the outer ring is separate from the base, the sides stay smooth when you release it after cooling. (It's impossible to get a baked cheesecake out of a regular cake pan without it breaking apart into pieces.)
- Thermometer: An instant-read thermometer is the absolute best way to ensure your cheesecake is done but not overdone. The cheesecake will continue to cook as it cools, so we're looking for 150 degrees F; baking to this internal temperature will give you the most amazingly creamy cheesecake. If you do not have an instant-read thermometer, gently shake the pan - you want a circular area of about 2 inches in the center to still jiggle slightly.
- Browned Top: As mentioned above, you can skip the browning step completely if you'd like. If you DO plan on browning the top, be sure to keep a close eye on it because it will brown quickly. I find that it darkens a shade or two after cooling, so keep that in mind, as well. Err on the side of removing it earlier rather than later.
- Chill: A thoroughly chilled cheesecake is best! While 6 hours is the minimum, overnight is even better. (Which is awesome, because cheesecake is the ultimate make-ahead dessert!)
Watch the Recipe Video:
If you make this New York cheesecake recipe and love it, remember to stop back and give it a 5-star rating - it helps others find the recipe! ❤️️
New York Cheesecake Recipe
Ingredients
For the Crust:
For the Cheesecake Filling:
- 40 ounces cream cheese, at room temperature and cut into 1-inch pieces
- 1½ cups (298 g) granulated sugar, divided
- ⅛ teaspoon salt
- ⅓ cup (76 g) sour cream
- 2 teaspoons lemon juice
- 2 teaspoons vanilla extract
- 2 egg yolks
- 6 eggs
For the Fresh Strawberry Topping:
- 2 pounds strawberries, hulled and cut into ¼-inch slices (about 3 cups sliced strawberries)
- ½ cup (99 g) granulated sugar
- Pinch of salt
- 1 cup (340 g) strawberry jam
- 2 tablespoons lemon juice
Instructions
- Preheat oven to 325 degrees F. Lightly grease the bottom and sides of a 9-inch springform pan.
- Make the Crust: In a medium bowl, stir together the graham cracker crumbs, brown sugar, and salt. Pour in the melted butter over the mixture and stir with a fork or rubber spatula until the entire mixture is moistened. Press evenly into the bottom and up the sides of the prepared springform pan and bake until the edges begin to lightly brown, 11 to 13 minutes. Set aside to cool completely.
- Reduce oven temperature to 200 degrees F. Adjust oven rack to lower-middle position.
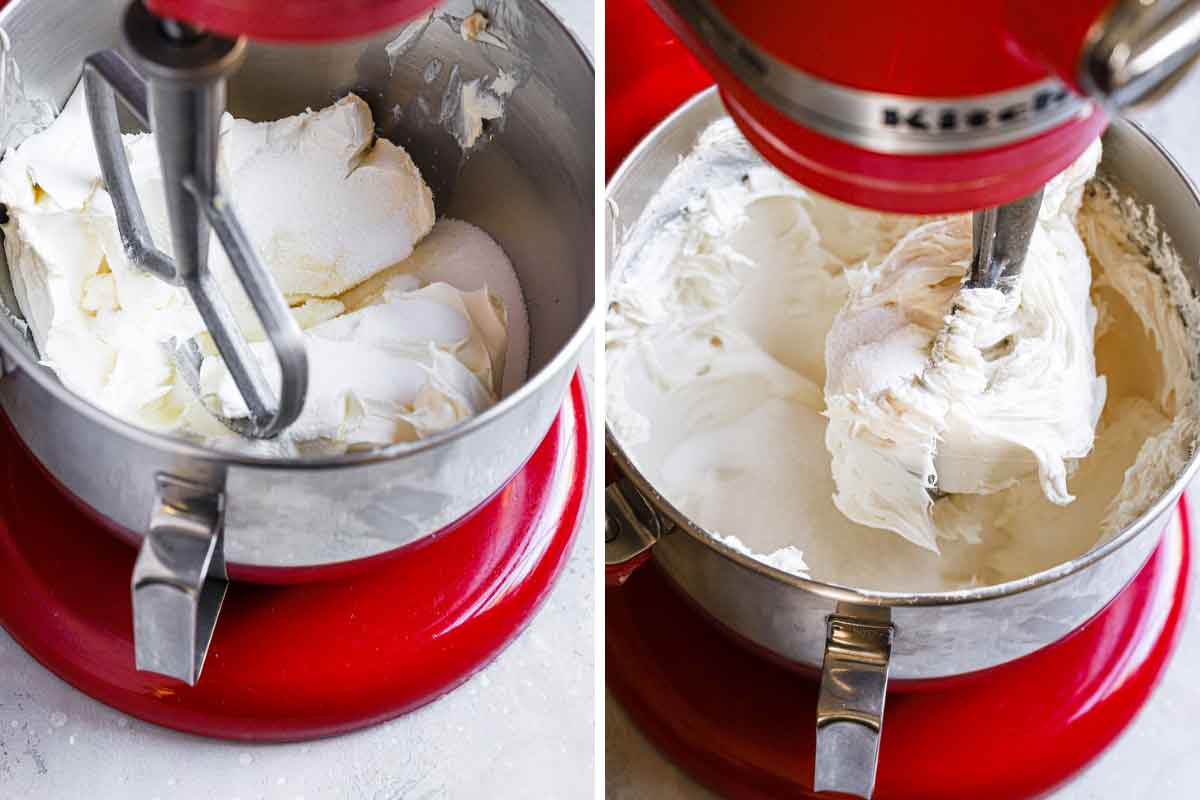
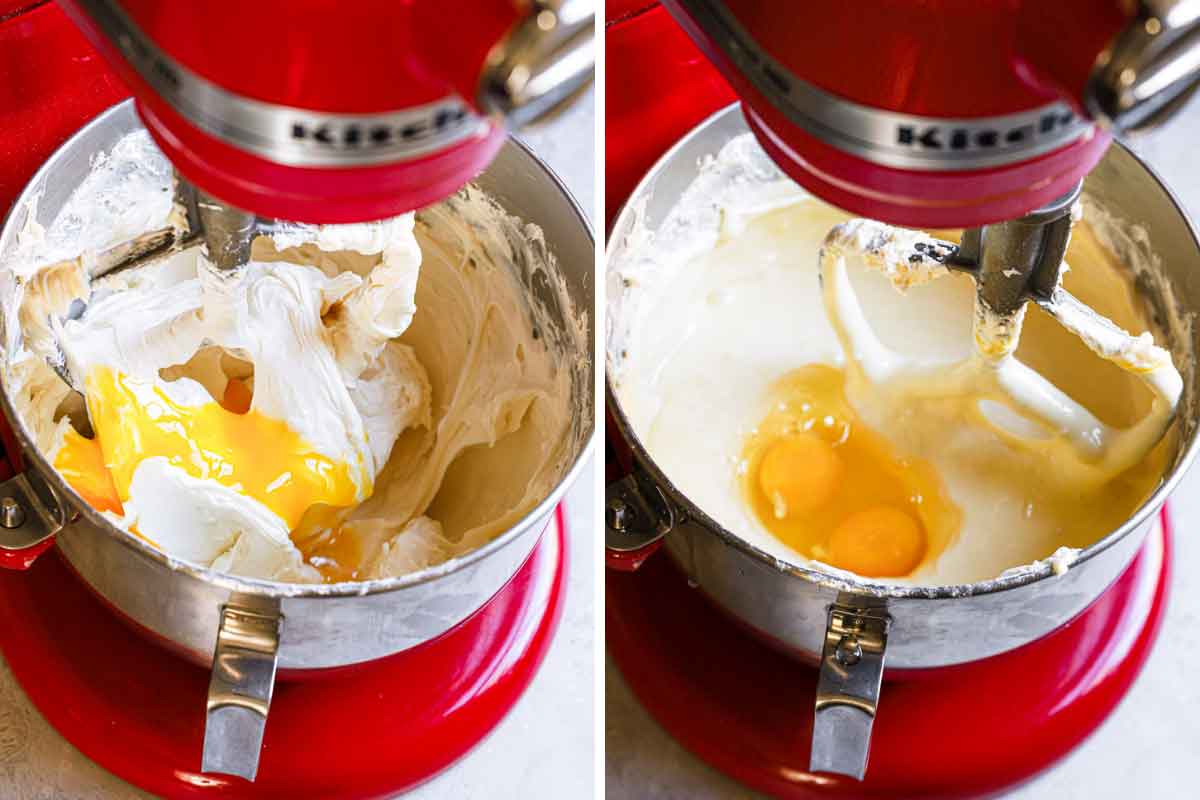
- Make the Cheesecake Filling: Beat the cream cheese, ¾ cup of the sugar, and the salt on medium-low speed until combined, about 1 minute. Beat in the remaining ¾ cup of sugar until combined, about 1 minute. Scrape down the sides of the bowl and the beater. Add the sour cream, lemon juice, and vanilla extract and beat on low speed until combined, 1 minute. Add the egg yolks and beat at medium-low speed until thoroughly combined, 1 minute. Scrape the bowl and beater well. Add the whole eggs two at a time, beating for 30 seconds after each addition.
- Pour the filling over the crust and place the springform pan on the lower-middle rack. Place a rimmed baking sheet on the rack below to catch any drips. Bake until the cheesecake registers 150 degrees F on an instant-read thermometer, 2 hours 15 minutes to 3 hours.
- Remove the cake from the oven and increase the oven temperature to 500 degrees F (leave the rimmed baking sheet on the bottom rack).
- Once the oven reaches 500 degrees, place the cheesecake on the upper-middle rack. Bake until the top is lightly browned, 3 to 8 minutes. Remove from the oven, place on a wire rack and allow to rest for 5 minutes. Run a paring knife between the cheesecake and the side of the springform pan, then allow to cool to room temperature, at least 3 hours. Cover with plastic wrap and refrigerate until completely chilled, at least 6 hours but ideally overnight.
- Remove the sides of the springform pan and allow to sit at room temperature for 30 minutes before serving.
- To Make the Fresh Strawberry Topping: In a large bowl, toss together the sliced strawberries and the sugar. Let sit for 30 minutes, stirring occasionally to combine.
- Process the jam in a food processor until smooth, about 10 seconds (or, whisk vigorously until the jam is completely smooth). Place the jam in a small saucepan and bring to a simmer over medium-high heat. Simmer, stirring frequently, until the jam is dark and no longer frothy, about 3 minutes. Stir in the lemon juice, then pour over the strawberries and stir to combine. Allow to cool to room temperature, then cover with plastic wrap and refrigerate until cold, at least 2 hours or up to 12 hours (the strawberry topping is best served within 1 day of making it).
Notes
- Springform Pan: To make this deep dish New York cheesecake recipe, a springform pan is essential. Using this pan will give your cheesecake height and, because the outer ring is separate from the base, the sides stay smooth when you release it after cooling. (It's impossible to get a baked cheesecake out of a regular cake pan without it breaking apart into pieces.)
- Thermometer: An instant-read thermometer is the absolute best way to ensure your cheesecake is done but not overdone. The cheesecake will continue to cook as it cools, so we're looking for 150 degrees F; baking to this internal temperature will give you the most amazingly creamy cheesecake. If you do not have an instant-read thermometer, gently shake the pan - you want a circular area of about 2 inches in the center to still jiggle slightly.
- Browned Top: As mentioned above, you can skip the browning step completely if you'd like. If you DO plan on browning the top, be sure to keep a close eye on it because it will brown quickly. I find that it darkens a shade or two after cooling, so keep that in mind, as well. Err on the side of removing it earlier rather than later.
- Chill: A thoroughly chilled cheesecake is best! While 6 hours is the minimum, overnight is even better. (Which is awesome, because cheesecake is the ultimate make-ahead dessert!)
- Storage: Keep the cheesecake in an airtight container or wrapped in plastic wrap in the refrigerator for up to 4 days.
- To Freeze the Entire Cheesecake: Chill overnight in the refrigerator, wrap in plastic, then wrap in foil, and place in a zip-top freezer bag. Freeze for up to 3 months. Thaw in the refrigerator overnight before serving.
- To Freeze Slices of Cheesecake: Wrap each slice individually in plastic wrap, then place in a zip-top freezer bag. Freeze for up to 3 months. Thaw in the refrigerator overnight or at room temperature for about 45 minutes.
Did you make this recipe?
Leave a review below, then snap a picture and tag @thebrowneyedbaker on Instagram so I can see it!
This recipe was originally published in April 2013.
Photography by Dee Frances.


Just made your brownie mosaic cheesecake last night for my husband’s and daughter’s birthday dinner. This was the first time one of my aunts tasted this cake, and you should have seen the joy on her face! I’m a NY Cheesecake girl myself, so I might treat myself to this cheesecake as reward for making everyone else so happy with the other.
That’s legit, right?
I so need to get a springform pan! I love that this recipe is without the water bath too. My favorite cheesecake is chocolate. My stepmother usually makes a chocolate cheesecake with pomegranate topping at Christmas.
This looks absolutely delicious! Can’t wait to try it.
I totally love everything the Cheesecake Factory has to offer but I’ll admit that sometimes, they don’t even taste like cheesecake! They’re delicious but there’s something to be said for a really well executed cheesecake. Yours looks amazing!
I used to tell everyone I didn’t like cheesecake, it was something about the texture. Then years went by and I gave it another chance. Now I eat a whole slice SO HAPPILY for dinner. How things change! I’ve never made homemade cheesecake before, only in the box, thanks for the recipe!
I have to admit cheesecake is not my favorite dessert. I am relatively new at coming around to enjoying it. This looks gorgeous and the strawberry sauce would surely win be over!
Oh! On another note….I recently used the Biscoff cookies for a Key Lime Pie recipe, and that crust was so amazing that I decided to use it on my last cheesecake. A little different than graham crackers, and quite yummy.
If you think that’s yummy, try Lorna Doone cookies as the crust…delicious!
Looks yummy, but still waiting for the Cheesecake Factory Carrot Cake Cheesecake recipe…..
Will have to try this recipe! I hate the water bath type too. But I also don’t like the cracks you get often times (which is why I do love the sour cream mixture topping to disguise that a bit :-)). Thanks!
Gorgeous cheesecake!
This turned out absolutely perfect!!
This looks utterly delicious! I love the simple cheesecakes with strawberry or cherry toppings. The fact this one doesn’t need to bake in a water bath is extra appealing!
What a gorgeous cheesecake! Nothing beats a piece of plain, perfectly rich and creamy cheesecake!
I love any and all cheesecake, and this is no exception!
I can’t stop staring at the pictures. It’s one of those days when I wish I could just pluck food off my computer screen and have a go at it. This cheesecake is absolutely gorgeous.
Oh my word I love cheesecake as well. And that peanut butter fudge sounds to die for! But I agree, sometimes that pure creaminess is all you want and this looks like it nailed it. Plus there is no need for a water bath – win win! That strawberry topping and whipped cream almost makes it like strawberry story cake…but oh do much better! ;)
This cheesecake looks absolutely delicious!
Just beautiful, Michelle! Nothing beats a Classic New York-Style Cheesecake. I could eat it for breakfast every single day with fresh strawberries. Best part? Wings colors! (Ha! Can’t help it.) But, guess what? I’ve got bricks of cream cheese coming to room temp on my kitchen island countertop right now. Yep. Going to make a “cockamamy cheesecake creation” today. LOL! ;) Pinned! xo
You had me at 40 ounces of cream cheese.
same here! I was waiting for someone to comment on that!
is it really that much? :o!!
Will definitely make this recipe next weekend!
Yeah, I noticed that too. 40 ounces is around 1.15 kilogram of cheese. And she suggested using a 9-inch springfrom pan. My previous cheesecake only used around 800 grams of cheese.
So did it work for you? I used 40 ounces of cheese, and in the end I had couldn’t fit all the batter into the pan, and I’ve already poured the pan almost to the brim. The cake also remains wobbly after baking for almost 2 hours (she suggested 1 1/2 hours).
Did you bake using Fahrenheit or Celsius
I baked at 90 C, which is converted from the suggested 200 F.
Cheesecakes usually firm up after being chilled for some time.
Yeah, it takes me 4 hours to bake this monster, any less and it still goofy in the middle. Going to try my third oven today and fifth attempt. I guess this is just on of those low and slow baking techniques.
Could someone please clarify? Do we really need 40 ounces of cream cheese???
Yes, you really need 40 ounces of cream cheese.
For me, classic NY cheesecake topped with strawberries is as good as it gets! This one is gorgeous – so tall and perfect!
I like using bacon and caramel for a topping
What a beautiful-looking cheesecake!! The strawberries on top are the perfect touch :)
Drooling here! Your cheesecake looks delicious! My Husband would go bonkers over this recipe!! Just perfect!!!
It looks sooo delicious! I want to eat it for breakfast! Sour cream is very hard to find over here. Is it ok to use crème fraîche instead? I don’t really know the difference between the two.
Hi Teresa, Yes I think you could substitute creme fraiche for the sour cream without a problem.
I haven’t had a fail yet but whenever a recipe calls for sour cream I sub for greek yogurt. We always have some in the fridge here.
Whenever I see the word cheesecake I always want to make it or eat it. It looks great.
This cheesecake looks exactly like every dream of a cheesecake that I’ve ever had. Perfection.
Gorgeous, the strawberry topping is a must!
I love te fact that this cheesecake doesn’t require being baked in a water bath, too! I rarely make cheesecake because I just don’t want to deal with it. Now I don’t have to AND can still get a stunning cake like you did! Wow, your photos are so beautiful and perfectly capture it. Pinned!
That looks and sounds like my perfect version of cheesecake. Love the look of the texture. Like that its not baked in a water bath as I find even if the water doesn’t get in, condensation often does.
Must try
Your pictures are stunning! I want to dive face first into this cheesecake, no lie.
me first!
You wouldn’t even hit the bottom its that deep :)
My personal critic would be that I would have to have the base double that thickness – yum!
This looks perfect. Wow! You did such a beautiful job! Really though, I am not surprised. Your foods always look professional!
I have this in the oven now. It’s almost time to remove it and it looks perfect. I will let yall know because if I can make this, anyone can ;)