How to Decorate Cookies with Royal Icing
Welcome to the first in what I plan to be a recurring “How-To” series here on Brown Eyed Baker. While recipes are all well and good, there are some techniques that are best explained in a step-by-step method, with pictures included (at least this is how I learn best). As I was decorating my Stanley Cup Playoffs cookies last week I thought that doing a tutorial on how to decorate cookies with royal icing would be a great first How-To post.

I was always very good at baking snowmen, Christmas trees, angels and the like in December, slapping on some buttercream, a few sprinkles and calling it a day. Not that it isn’t good. It is definitely good. But then royal icing came onto my radar. The possibilities seemed endless – a completely smooth finish to the cookies and intricate designs? Now THAT looked fun! I’m here to guide you on a step-by-step tutorial on how to achieve any design you want on any shape cookie. Ready? Let’s begin!
Step 1: Find a Good Sugar Cookie Recipe
This might seem obvious, but not all sugar cookie recipes stand up well to heavy-duty decorating. If you don’t already have a favorite, let me point you to mine: Dorie Greenspan’s All-Occasion Sugar Cookies. They’re incredible.
Step 2: Cool Cookies Completely
Again, maybe elementary, but we’re going step-by-step here. You can’t decorate cookies that have just come out of the oven. Or even cookies that are slightly warm. They need to be completely cool before you can move on to decorating.
Step 3: The Equipment
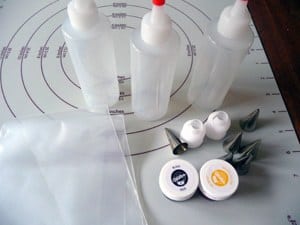
Now, you don’t necessarily need fancy equipment for decorating with royal icing, but investing in just a few decorating tips and couplers, some disposable pastry bags and squeeze bottles will make your cookie decorating experience exponentially more pleasant. Here is a run-down of what I typically use:
♦ 12″ disposable pastry bags. So easy to just throw away when you’re done instead of washing them!
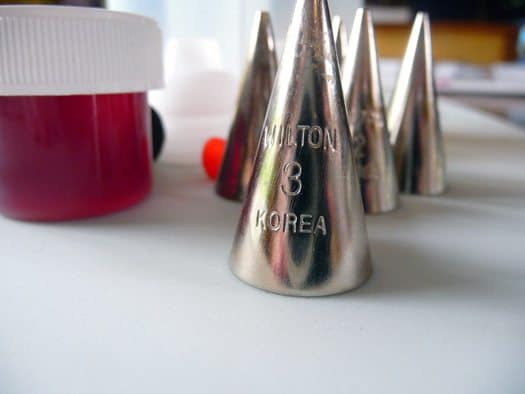
♦ Decorating tips. For outlining the cookie I use a #3 tip and anything from a #1 to #3 for intricate designs on the cookie. It’s not a bad idea to have a few of each number, as I find myself using them a lot.
♦ Couplers. These make it easy to switch the size tip you are using in the same color.
♦ Squeeze Bottles. I use these for flooding my cookies. Since the royal icing is very thin at this point, it’s a much neater alternative to a cut-open pastry bag. Plus you can put the cap on and save any extra icing for next time.
♦ Small bowls or Tupperware (to color your icing)
♦ Toothpicks.
Step 4: Prep, Prep, Prep!
This got me the first time I decorated with royal icing, and is especially important if you are going to be using multiple colors and different tips. I flew by the seat of my pants and ended up making a huge mess, it took twice as long as it should have, and I was trying to fish used tips out of pastry bags to re-use them somewhere else. Your plan of action:
♦ Write down how many different colors you will be using and take out that many pastry bags and couplers and prepare them. Also figure out what size decorating tips you will be using and fit them to the pastry bags.
♦ If you don’t have squeeze bottles for flooding, add additional pastry bags for however many colors you will use for flooding, in additional to the bags of that color you will use for detail work (if any).
♦ Have your icing colors ready and as many small mixing bowls (Tupperware works great for this) as you have colors planned.
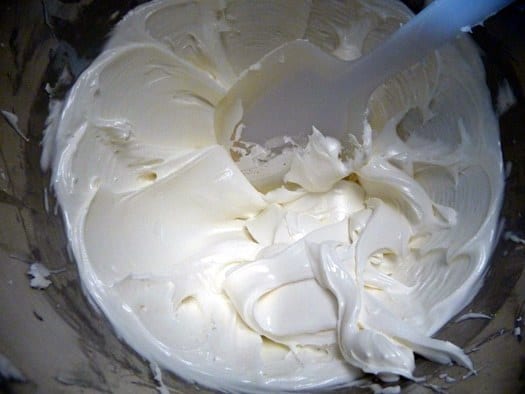
Step 5: Make the Royal Icing
The recipe for royal icing is very simple:
Save This Recipe
4 cups powdered sugar
2 tablespoons meringue powder
6 tablespoons water
Mix all ingredients on low speed for 7-10 minutes or until the icing loses its shine. Add more water by the teaspoon if it appears too stiff. At this stage you want to be able to pipe it easily:
Step 6: Color the Icing
Divide the icing into your containers based on how much you will need of each one. Proceed to color the icing and then cover each container with a damp paper towel. It is key when working with royal icing not to allow it to dry out.
Step 7: Outline the Cookies
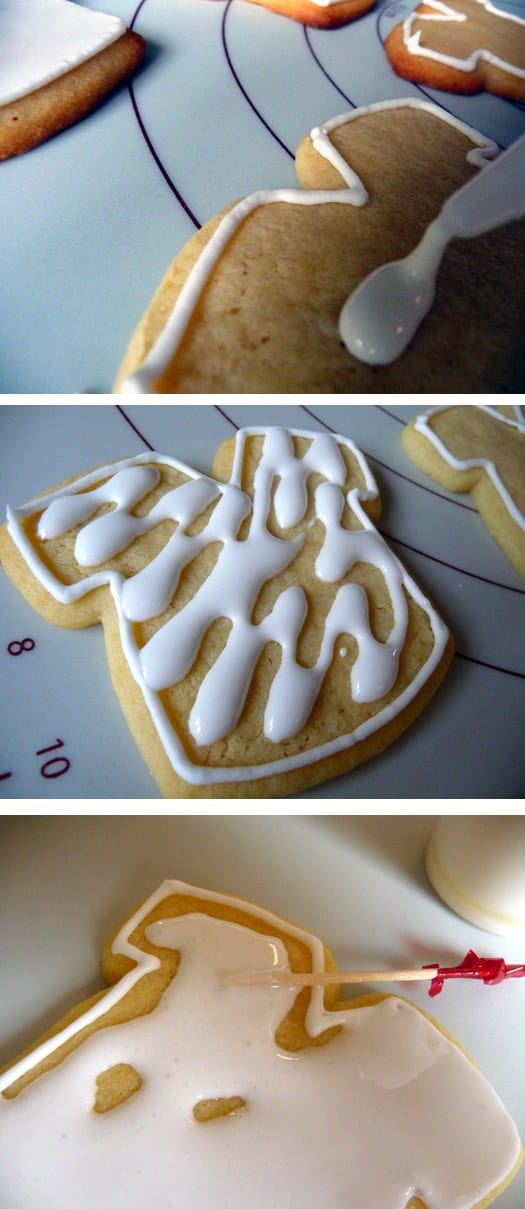
You will want to outline the cookies with whatever color you will be using to fill them in with. Place some of the icing into a disposable pastry bag fitted with a #3 tip and outline the outside of the cookie. I find that keeping the tip about ½-inch above the cookie while moving it allows the icing to lay on the cookie more easily.
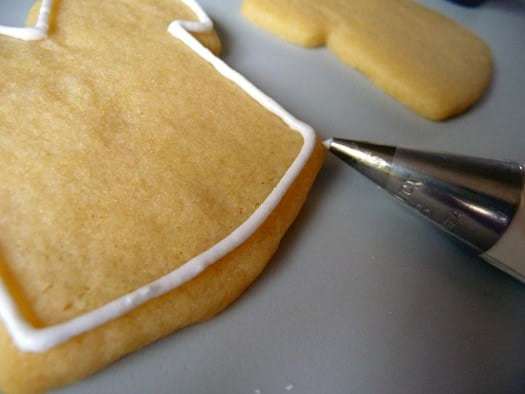
You’ll want to make sure that the outline is pretty well set before moving on to flooding the cookies, but I generally find that by the time I am done outlining the first ones are already dry.
Step 8: Flood the Cookies
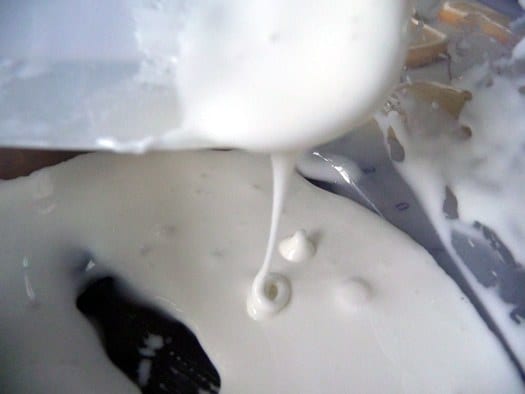
Take whatever color you are using to fill in the cookies and slowly start adding a few drops of water at a time, until the icing reaches an almost liquid consistency. The test here is to pick some icing up with a spoon and let it drizzle back into the bowl – the drizzle should disappear into the bowl within 10 seconds. Once you have achieved this, you are ready.
Either fill a squeeze bottle with the thinned icing or transfer it to a disposable pastry bag with a ¼-inch hole cut off the end.
Now squeeze in the icing to almost completely fill the inside the cookie.
Then take a toothpick and gently use it to distribute the icing to any empty spots.
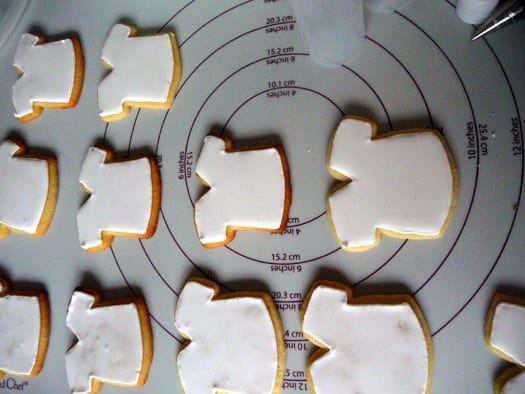
Once you are done the cookies need to dry completely before moving on to any intricate piped designs. Some bakers will let them sit overnight but I generally find that a 2-3 hour rest will do the trick.
Now use whatever colors and tips you’d like to achieve the design you want!

♦ ♦ ♦
Was this helpful? I’d love your feedback on this post since it’s the first of its kind on Brown Eyed Baker! Any questions or additional tips to share?
What do you want to learn? I’d love to hear what you would like to see featured in the How-To series. A reader has already mentioned that she’d like to see a tutorial on baking bread with yeast. What’s on your list?
![]() Don’t forget to subscribe to the Brown Eyed Baker RSS feed to ensure you don’t miss any upcoming posts!
Don’t forget to subscribe to the Brown Eyed Baker RSS feed to ensure you don’t miss any upcoming posts!


Hi Michelle,
Does the powdered sugar need sifting? I am new to royal icing.
Many thanks,
Rima
Hi Rima, I do not sift.
Wonderful tutorial, answered the questions I needed answered, perfection!
Thanks for taking the time to do this, and cutting out the extra info.
Could sprinkles be added right after flooding the cookies?
Hi Sarah, It should be fine, but I would wait a little while – the icing should be slightly set but not yet hard. If you do it immediately after flooding I fear the sprinkles would melt into the icing a bit and not set on top.
What do you use to make icing black?
Hi Norma, I use gel food coloring (black).
Hi,
I was wondering if it is possible to use a buttercream frosting to decorate sugar cookies instead of the royal icing?
Hi Tanvi, You can if you just want to slather it on, but you won’t be able to do any intricate decorating with it, as you can with royal icing.
I always thought these cookies were hard but your directions make it logical. Can you freeze the cookies, either before or after they are iced?
Hi Denise, Yes, you can freeze them at either point!
I immensely enjoyed the step by step instructions. The completed project of the cookie was a little hard. I under-cooked some to get the desired texture. I think I will make this cookie again but would like to add more of the Almond Extract to give it more flavor. I have not frosted/decorated them yet. But will get back to you on that. Maybe it will allow me to place a photo of the finished product. I do your like web page its very GOOD. Keep up the good work.
This was wonderful! Thank you!
My grand daughter is into volleyball and I wanted to make cookies for in their “take home” bags. Following these instructions – I think I can actually Do It! Again my thanks for you simplicity in dealing with royal icing!
Can you substitute real egg whites for powered egg whites and what is ratio?
Thank-you
Charwyn
Hi Charwyn, I don’t think that’s possible.
Thanks for the great tutorial. I followed it exactly. I have 2 questions. I was disappointed that the royal icing didn’t look shiny after it dried. Also, I was doing candy cane shaped cookies and I tried to do the red & white striping with not much success. I did the two separate colors but they didn’t look good using the outline & flooding technique. Should I have skipped the outline for that or should I have done white over all and then after they dried put the red on top of the white?
Hi Sue, I’m not sure that my royal icing consistently dries shiny. As for the stripes, doing all white and then layering the red might work! Check out http://bakeat350.blogspot.com – Bridget has TONS of tutorials for different types of cookies and designs.
[…] for a great frugal idea for Mother’s Day? You can make your own Cookie Bouquet for Mother’s Day, Valentine’s Day, Easter, Baby Shower, A Birthday or just because you […]
http://www.birthdayideasforhusband.org/birthday-ideas-for-husband-to-show-you-care/
I love this recipe! I’ve been using it for the last 5 years and it never fails. I recently moved and lost my copy of the recipe but thanks to Google and remembering the phrase “brown eyed” I found it in no time :)
i want to learn to write on cookies.
I found some Disney typeface online, published it, made it the
dimension I needed, and mapped them onto the gold/yellow paper.
Love your easy to follow instructions. Did you use a cookie cutter for the shirts?
Hi Emily, I did! It came in a set of sports cookie cutters from Wilton.
excellent article, esp the part about outlining the cookies first.
Thank you.
Thanks so much for this tutorial, it was so helpful! This was the first time my cookies turned out as planned, and I tried my best to be patient at each step. The pictures were extremely helpful as well. (PS The icing was delicious!)
Gosh, not sure anyone would read to the 467th comment, but here goes.
I have made sugar cookie cut outs with frosting for many years now. I make them at Christmas and Valentine’s Day. I usually just make a powdered sugar glaze, tint it, and use special sprinkles and colored sugar to decorate.
On Halloween I use a classic sugar cookie recipe, and decorate the circles as pumpkins and other ghouls. This year my kids wanted to do some other shapes for cut outs, so I decided to try the method above to get a cleaner look for the icing and decorations.
While the finished product definitely looked nicer, they do not taste as good, and the texture is brittle, not soft. I guess we prefer the way that the powdered sugar icing melts into the cookie a little. Also, it’s incredibly time consuming to outline, flood, then wait to dry, and finally decorate. Getting the royal icing to the right consistency is very tedious. I bought the squeeze bottles for flooding, and found that you could use the tip of the bottle to spread the icing, but filling the bottles, etc., was a PITA and wasted so much icing. To see a picture of our finished product, see: https://lynnehartley.shutterfly.com/1880
hello,, thanks for your reply, sorry but my question is still unanswered, my cookies(base) becomes soft after decorating n drying them how can they remain crisp…plz reply….thanks
Hi Naazi, You may want to experiment with some different cookie recipes. The decorating should have zero affect on the texture of the cookie. If yours are too soft, I would look for a crispier cookie recipe.
hii,, i liked your post very much but do share how you dry n store them n how it can remain crisp because after drying them my cookies become soft, i want it to be crisp…..i use the recipe without baking powder…..thanks for all the help
Hi Naazi, The icing should not get soft once it has dried completely. Storing the cookies in an airtight container should not cause the icing to soften.
I knew you were awesome, but I didn’t realize you were a yinzer! LOVE! :)
I don’t understand step 8 can you break it down for me after you decorate the outline ? Please thanks :)
Thanks so much, I found this very helpful.
I am ancient mother of three-year-old twins and just asked Siri why do the cookies I make always look like I’m in first grade? Siri led me to your website. I love the tutorial. . . it has given me hope and I will try your tips forthwith. Many heartfelt thanks.
I just want to say how much I appreciate this post about decorating cookies with royal icing. I have worked with it before and it has always been messy and somewhat frustrating. You streamlined the process and have wonderful tips! I followed your steps to make valentines cookies for my daughter’s class and they turned out so well! Thank you!
I still do not understand one point. Do I need to thicken the icing after I have flooded the cookies. Is the consistently of the icing used for flooding too thin to use for decorating?
Hi Janice, Yes, you are correct. The icing needs to be thickened after the cookies have been flooded. The consistency used for flooding is too thin for decorating.
Thank you Thank you Thank you!!!! I have ALWAYS wanted to know how to make the icing so smooth! Your directions were wonderful and so easy to follow!
Hi silly question but what is meringue powder not sure if I will find it in Australia is there something else ?? Normally I make royal icing out if icing sugar, egg white and cream if tartar thank you in adavance
Hi Jenny, Meringue powder is basically a dried egg white powder: http://www.amazon.com/Wilton-702-6015-Meringue-Powder-Can/dp/B000ZNOVCA/ref=sr_1_1?ie=UTF8&qid=1389284909&sr=8-1&keywords=meringue+powder. There are other royal icing recipes that do not use meringue powder, but I have not tried them. If you cannot get meringue powder, you may need to stick with one of those.
Can I package cookies with royal icing on them. Does the icing hold up well to some handling on store shelves or stick to the packaging , etc???
Hi John, Yes, you can definitely package cookies decorated with royal icing. Once the icing has dried it is rock-hard. You can stack layers with parchment or wax paper between them, wrap in plastic wrap, etc. As long as you let it dry completely, the icing will not stick to packaging.
This was super helpful! I can’t have dairy so I was trying to find a frosting to frost Christmas cookies that I converted to be dairy free! I never heard of royal icing, but I think I will give it a try!
Thanks!