How to Decorate Cookies with Royal Icing
Welcome to the first in what I plan to be a recurring “How-To” series here on Brown Eyed Baker. While recipes are all well and good, there are some techniques that are best explained in a step-by-step method, with pictures included (at least this is how I learn best). As I was decorating my Stanley Cup Playoffs cookies last week I thought that doing a tutorial on how to decorate cookies with royal icing would be a great first How-To post.

I was always very good at baking snowmen, Christmas trees, angels and the like in December, slapping on some buttercream, a few sprinkles and calling it a day. Not that it isn’t good. It is definitely good. But then royal icing came onto my radar. The possibilities seemed endless – a completely smooth finish to the cookies and intricate designs? Now THAT looked fun! I’m here to guide you on a step-by-step tutorial on how to achieve any design you want on any shape cookie. Ready? Let’s begin!
Step 1: Find a Good Sugar Cookie Recipe
This might seem obvious, but not all sugar cookie recipes stand up well to heavy-duty decorating. If you don’t already have a favorite, let me point you to mine: Dorie Greenspan’s All-Occasion Sugar Cookies. They’re incredible.
Step 2: Cool Cookies Completely
Again, maybe elementary, but we’re going step-by-step here. You can’t decorate cookies that have just come out of the oven. Or even cookies that are slightly warm. They need to be completely cool before you can move on to decorating.
Step 3: The Equipment
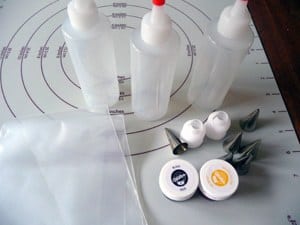
Now, you don’t necessarily need fancy equipment for decorating with royal icing, but investing in just a few decorating tips and couplers, some disposable pastry bags and squeeze bottles will make your cookie decorating experience exponentially more pleasant. Here is a run-down of what I typically use:
♦ 12″ disposable pastry bags. So easy to just throw away when you’re done instead of washing them!
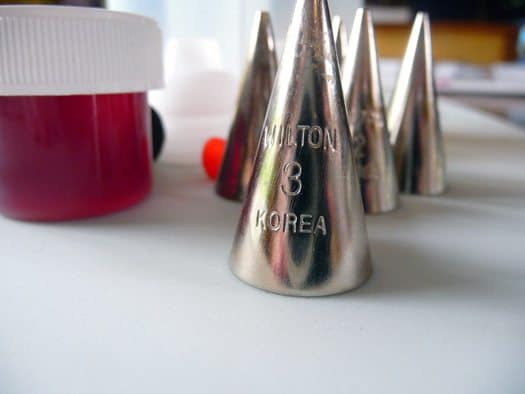
♦ Decorating tips. For outlining the cookie I use a #3 tip and anything from a #1 to #3 for intricate designs on the cookie. It’s not a bad idea to have a few of each number, as I find myself using them a lot.
♦ Couplers. These make it easy to switch the size tip you are using in the same color.
♦ Squeeze Bottles. I use these for flooding my cookies. Since the royal icing is very thin at this point, it’s a much neater alternative to a cut-open pastry bag. Plus you can put the cap on and save any extra icing for next time.
♦ Small bowls or Tupperware (to color your icing)
♦ Toothpicks.
Step 4: Prep, Prep, Prep!
This got me the first time I decorated with royal icing, and is especially important if you are going to be using multiple colors and different tips. I flew by the seat of my pants and ended up making a huge mess, it took twice as long as it should have, and I was trying to fish used tips out of pastry bags to re-use them somewhere else. Your plan of action:
♦ Write down how many different colors you will be using and take out that many pastry bags and couplers and prepare them. Also figure out what size decorating tips you will be using and fit them to the pastry bags.
♦ If you don’t have squeeze bottles for flooding, add additional pastry bags for however many colors you will use for flooding, in additional to the bags of that color you will use for detail work (if any).
♦ Have your icing colors ready and as many small mixing bowls (Tupperware works great for this) as you have colors planned.
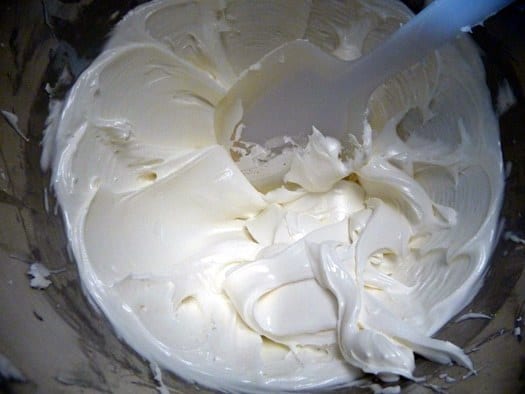
Step 5: Make the Royal Icing
The recipe for royal icing is very simple:
Save This Recipe
4 cups powdered sugar
2 tablespoons meringue powder
6 tablespoons water
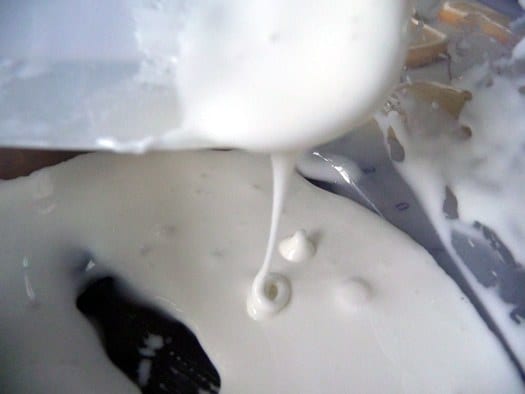
Mix all ingredients on low speed for 7-10 minutes or until the icing loses its shine. Add more water by the teaspoon if it appears too stiff. At this stage you want to be able to pipe it easily:
Step 6: Color the Icing
Divide the icing into your containers based on how much you will need of each one. Proceed to color the icing and then cover each container with a damp paper towel. It is key when working with royal icing not to allow it to dry out.
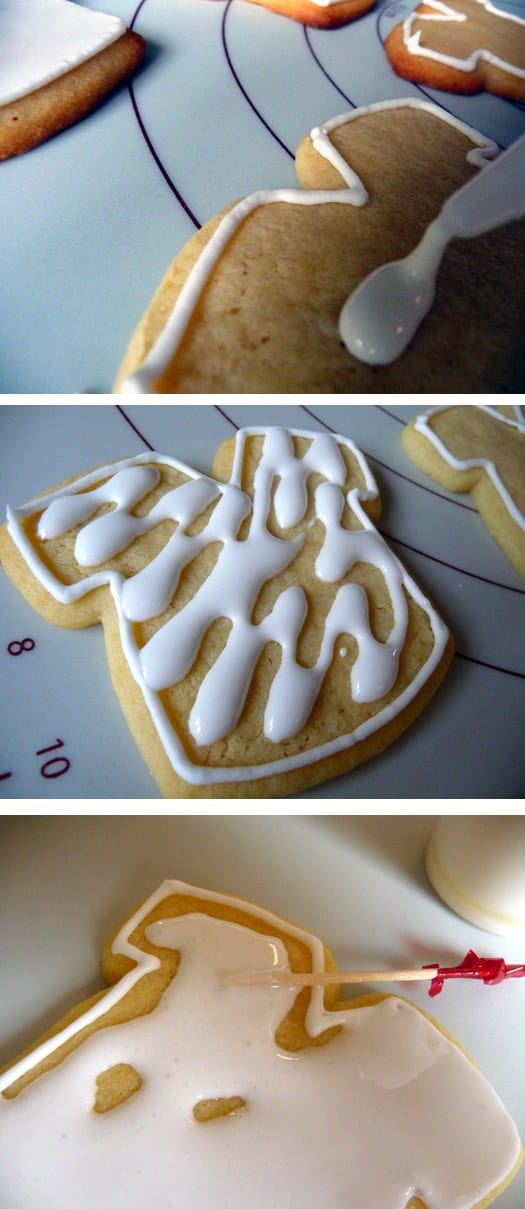
Step 7: Outline the Cookies
You will want to outline the cookies with whatever color you will be using to fill them in with. Place some of the icing into a disposable pastry bag fitted with a #3 tip and outline the outside of the cookie. I find that keeping the tip about ½-inch above the cookie while moving it allows the icing to lay on the cookie more easily.
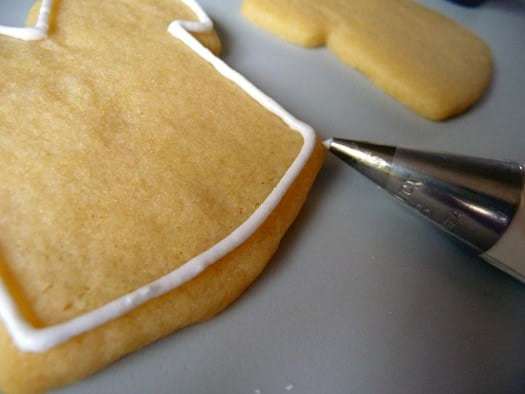
You’ll want to make sure that the outline is pretty well set before moving on to flooding the cookies, but I generally find that by the time I am done outlining the first ones are already dry.
Step 8: Flood the Cookies
Take whatever color you are using to fill in the cookies and slowly start adding a few drops of water at a time, until the icing reaches an almost liquid consistency. The test here is to pick some icing up with a spoon and let it drizzle back into the bowl – the drizzle should disappear into the bowl within 10 seconds. Once you have achieved this, you are ready.
Either fill a squeeze bottle with the thinned icing or transfer it to a disposable pastry bag with a ¼-inch hole cut off the end.
Now squeeze in the icing to almost completely fill the inside the cookie.
Then take a toothpick and gently use it to distribute the icing to any empty spots.
Once you are done the cookies need to dry completely before moving on to any intricate piped designs. Some bakers will let them sit overnight but I generally find that a 2-3 hour rest will do the trick.
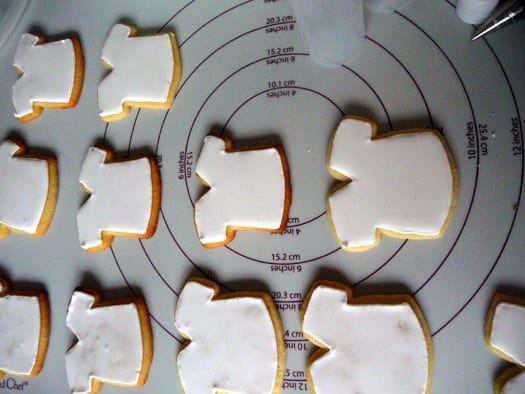
Now use whatever colors and tips you’d like to achieve the design you want!

♦ ♦ ♦
Was this helpful? I’d love your feedback on this post since it’s the first of its kind on Brown Eyed Baker! Any questions or additional tips to share?
What do you want to learn? I’d love to hear what you would like to see featured in the How-To series. A reader has already mentioned that she’d like to see a tutorial on baking bread with yeast. What’s on your list?
![]() Don’t forget to subscribe to the Brown Eyed Baker RSS feed to ensure you don’t miss any upcoming posts!
Don’t forget to subscribe to the Brown Eyed Baker RSS feed to ensure you don’t miss any upcoming posts!


Your step by step guide was extremly helpful, thank you. I haven’t decorated sugar cookies before and I’m so greatful I found your guide, I have my list ready for the store and I’m looking forward to decorating this weekend. I think will it go much smoother thanks to all of your tips. I’ll be trying out your soft and chewy sugar cookie recipe for my first batch! Your website has my become first stop when preparing to bake. Thank you for all the great recipes. p.s. Your soft pretzels are still my favorite item!
This tutorial was exremely helpful.
I cannot thank you enough for posting this. I was able to make beautiful cookies for a bake sale last year and now I am making cute cookies for my dayghters 2nd birthday.
Thank you again!
I loved this. It is explained wonderful and easy! Thank you for your expertise.
I just want to mention I am newbie to blogging and absolutely liked your blog site. Likely I’m going to bookmark your blog post . You actually have good articles. Kudos for sharing your blog.
I always failed miserably at decorating my cookies with icing.
Thanks so much for this post! Its really going to help a lot next time I attempt at it.
does this work on gingerbread cookies or is this only for sugar cookies?
Hi Jamie, You could definitely use this on gingerbread cookies!
Hi, thanks for sharing! How do I store left over icing? And hw long can it be stored for?
Hi Lisa, I keep mine in tupperware containers; I would use it within a few days. It can dry out if exposed to air.
When I originally left a comment I appear to have clicked the -Notify me when new comments are
added- checkbox and from now on every time a comment is added I recieve
4 emails with the exact same comment. There has to be an
easy method you are able to remove me from that service?
Many thanks!
Hi! First of all this was very helpful. I have always been curious about how to decorate cookies in this method. I am curious about how much icing your recipe yields though? Once all is said and done with adding water of course. Thanks!
hi, we dont have meriunge powder available where i live. what can i use to substitute this?
thanks.
Unfortunately, there isn’t a substitute for meringue powder in this particular recipe. I would search online for a royal icing recipe without meringue powder.
Brilliant tutorial! It helped my friend and I to bake gorgeous cookies for a baby shower. Thank you – your blog is wonderful :-)
Which sugar cookie recipe do you prefer: the all occasion or the soft and chewy ?
Hi Lauren, I would go with the soft and chewy.
I’m new at baking and trying to make some cookies for my daughter’s baby shower. I can’t not find the “merengue powder” nor ” Just whites” what can I replace this with? Thank you very much.
Hi Hilda, I’m not sure where you are located, but I usually find meringue powder at a craft store like Michael’s (not at the grocery store). If you can’t find it, there really is no substitution for this particular recipe; you may need to try Googling “royal icing recipe without meringue powder” and see what you can make work. Good luck!
Oops just saw 1 week awesome. Thanks.
I found this after calling around for graduation cap cookies for my sons party and finding $3.50 per cookie is the lowest price. So I. Will be trying this instead. How long do the cookies keep?
Hi,
I tried following this recipe and my frosting had a more granulated appearance to it rather than the smooth shiny shine your cookies seem to have. Do you have any thoughts as to why or what I can do to correct the problem? Thanks!
priti
Hi Priti, Did you use meringue powder, powdered sugar and water? Be sure you’re not using granulated sugar, as that would definitely be gritty. Otherwise, sift the powdered sugar if yours is clumpy, but everything should dissolve together into a smooth icing.
Oh my god, thank you! Yes, I was using granulated sugar by accident! I did it again with the correct sugar and it came out perfect, thank you so much for pointing out my silly mistake!
Why isn’t there a Link to save this to our recipe box?
Hi Rebecca, Ahh, probably because it isn’t formatted as an actual recipe. I will work on getting it revised so it can be saved. Thanks for bringing that to my attention!
Thanks! Looking forward to trying it and appreciate the quick and efficient directions!
Can the frosted cookies be frozen?
Hi Tracy, Yes! I always use this method from Bake at 350: http://bakeat350.blogspot.com/2012/05/yes-you-can-freeze-decorated.html
I really love cookies!
Hi, I was wondering about how much royal icing this ends up making. Planning on using it to decorate gingerbread men (also your recipe). Thanks!
Thanks so much for such a great tutorial, it was very helpful!
Let me join the crowd here and say this is exactly what I was looking for! I’ve read through all the comments and I don’t think I’ve seen this question, though: Any tips on wrapping and transporting these cookies? Can they be wrapped individually in plastic wrap and stacked? Thank you so much. Wonderful tutorial.
Hi Sherry, Yes, once completely dry, you can definitely wrap these individually and stack them for storage. I’m glad you found the tutorial helpful!
Thank you so much for posting this!! Very helpful!
Great, just what I was looking for!
wow wow wow!!!
that was awesome. Thanx a million
:)
Thank you! Thank you! Thank you!!!!!
My daughters birthday is approaching, and I want to have beautifully iced sugar cookies. The local bakers are asking $2 per cookie!!! Now I’m going to be able to make my own!!!! With your guidance I have no doubt that I can do it!!! Thank you again!!!!
This might be a silly question, but when decorating football shaped cookies, is that a brown tinted icing or a chocolate icing? thanks!
Hi Pam, The icing for the football cookies is royal icing that I tinted brown.
What a great how-to! I do find the step-by-step picture helpful. Will definitely try your method.
I know you have gotten a ton of comments on this tutorial but wanted to add one more – thanks very much for the incredible detail that you put into this post. Following your instructions to the letter, I successfully made and decorated cookies for the first time and they were a big hit. Just wanted to say “thanks!”